I followed along with the skill builder tutorial. There were many hiccups along the way. Overall, great learning moments from this skill builder.
1.) First, I made the drawing in Vectorworks. In hindsight, I did my first sketch wrong. It took the help of Professor Ben to get it to be right.
Remember for future:
* File needs to be exported as version 2010
* The shape needs to be placed close to the 0,0 in the top right quadrant
* Don’t use paint bucket, just have the individual shapes for the pockets and contours
Here is the Vectorworks of the version that I did wrong:
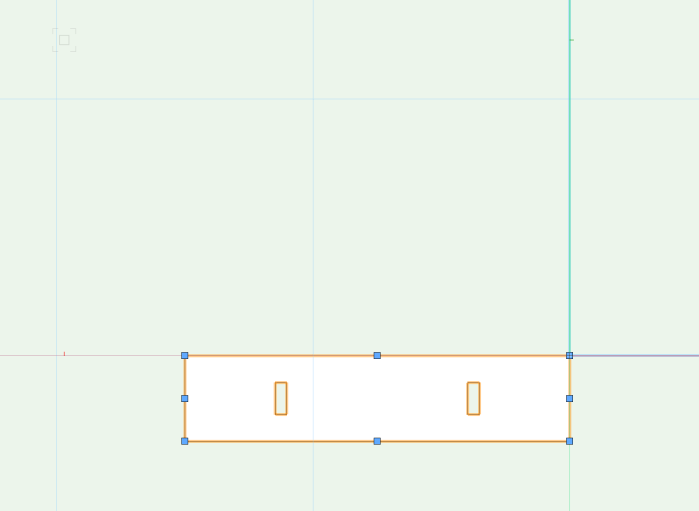
Here is the version that is right:

2.) Next I went into CAM and adjusted the settings to match the one in the tutorial and my bit size. After the first cut, I realized I did not set up the settings properly.
* Note: Remember to make sure there is breakthrough. Also make sure that when you view the 3D version there are the lines that indicate the layers for cutting. The first timeI did it was wrong and only showed one line (so the “blueprint” version looked flat).

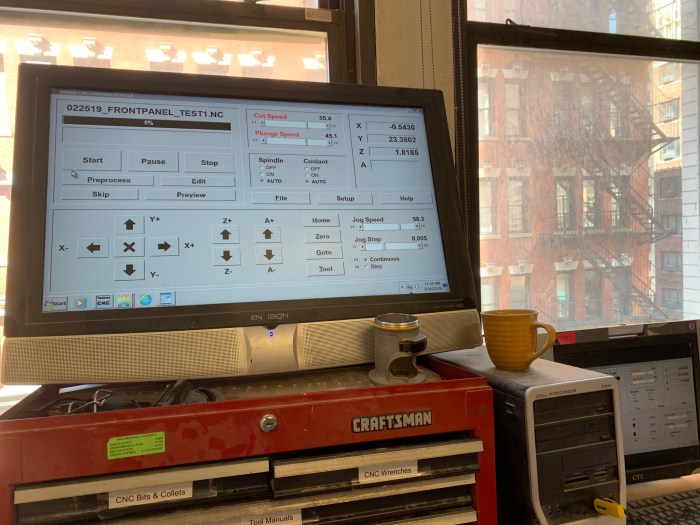
3.) I saved with the G1 Button and it turned the file to a NC file. Then I took the usb to the desktop with the CNC program.
4.) It took me a long time to figure out the colette and bit situation. This took some asking around, especially since I did not have the right size bit. I had a 1/2″ and a 1/8″, which was too small for any of the colettes. Eventually, I ended up borrowing a 1/4″ bit (thank you Nick!).
I also screwed down the plank of wood.


5.) Once the bit was in, I tried zeroing. This part was straightforward but I forgot how to move the x axis. I had to stop and review notes to figure that out. Eventually, it was honed and I was ready to select Zero All.
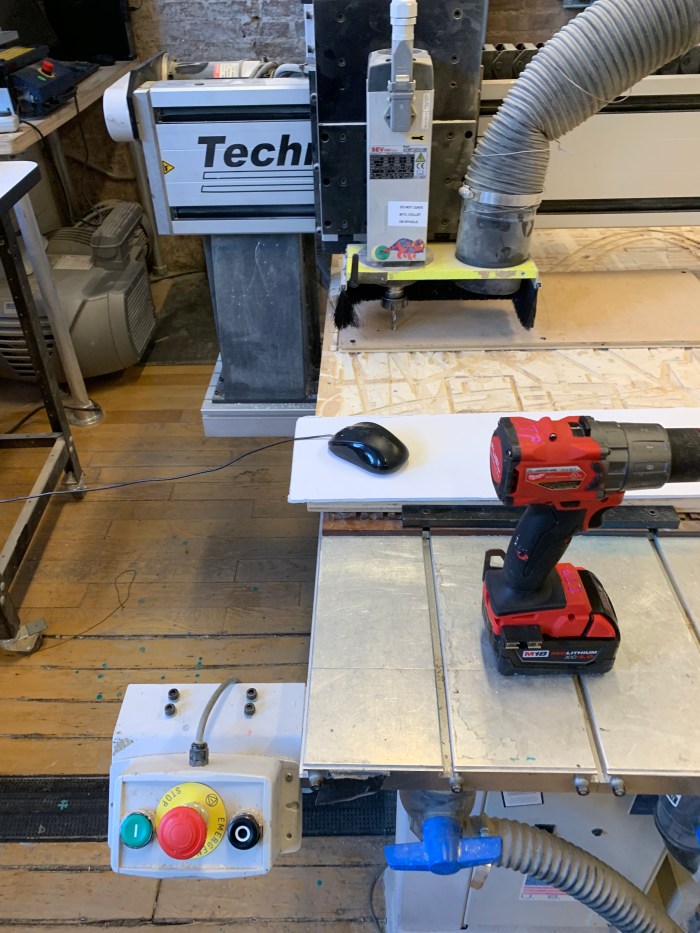
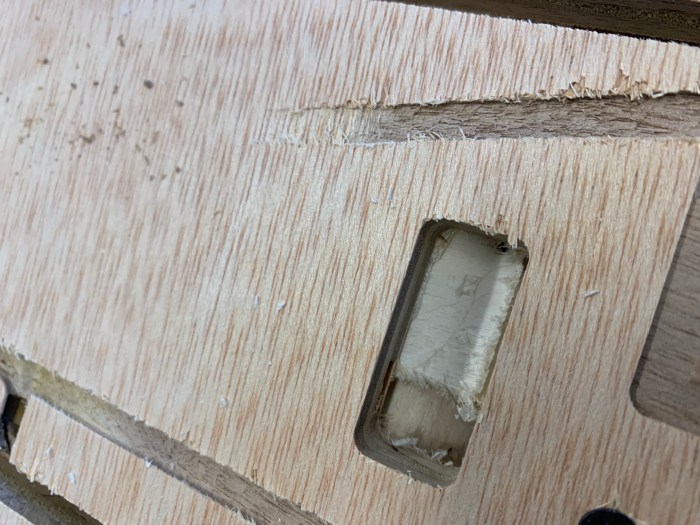
6.) Next, bit was the exciting part of finally cutting the wood with the CNC!
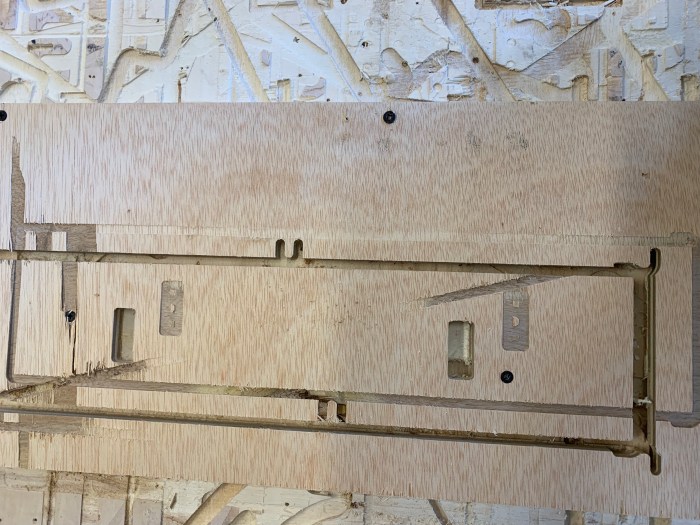
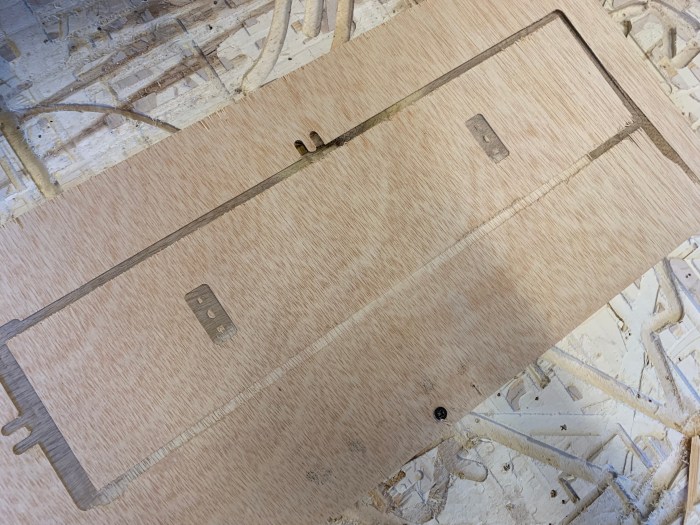
The issue was that it stopped after only cutting into the wood a few times, so it just made a small dent of the outline. Below is the image of the first cut.
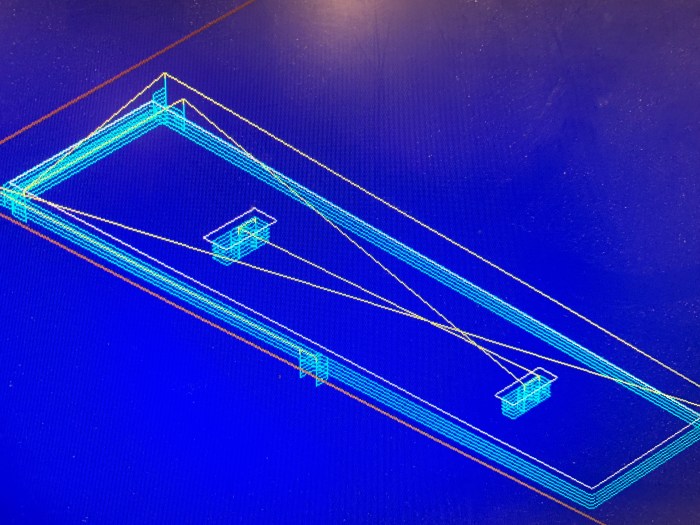
7.) I went back to the CAM to try and see what was wrong with my settings. At the time, I assumed it was most likely because of my settings in CAM.
I readjusted the contour settings, and realized that it was supposed to show something that showed the multiple layer cuts.
8.) After readjusting, I repeated the zeroing steps. I couldn’t remember exactly where it started so the placement of the cut lines is different this second try. I also didn’t change the piece of wood, because I consider it practice.
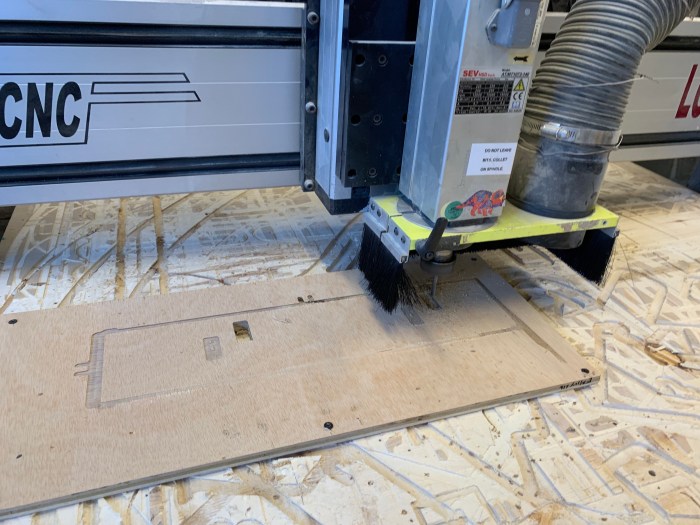
9.) Second time it did cut through thankfully. One issue was the piece was popping up as it was getting cut. This caused the bit to drag along the surface of the not wood that wasn’t flat anymore. I had to pause the CNC and screw down the parts that were becoming raised.
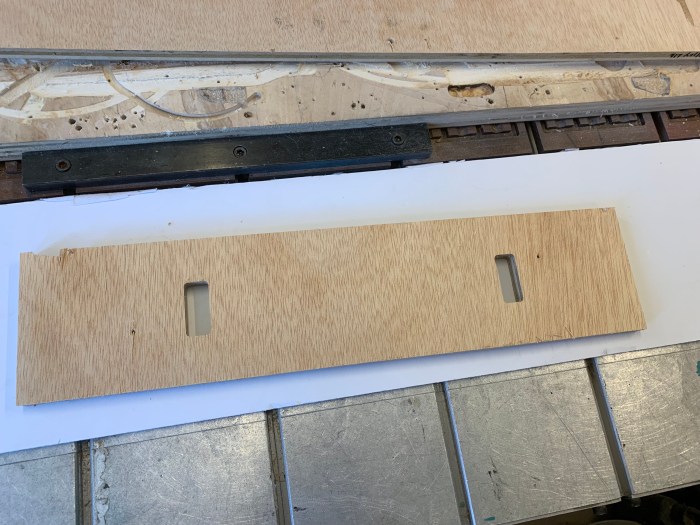
10.) Final cuts were made! One side looks awful, but the other side was not as bad.