Final Piece:
Solar energy will power the wireless communication device and temperature/humidity sensor. When an unhealthy (for the bunny) combination of high temperature and high humidity is measured, the feather RF will communicate to the other feather RF to use the relay to turn on the fan. The fan will then be used to cool the bunny (yay!).
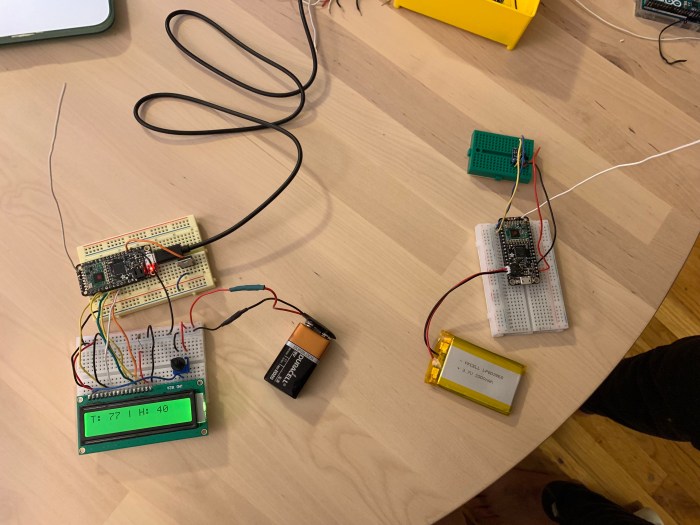
Bunny Bot TX (left) transmits the signal using Adafruit’s FeatherRF. On Bunny Bot TX there is a solar panel mounted on the back. The solar panel is charging a 3.7V, 2000 mAH li-poly battery that powers the temperature sensor mounted in the nose of the Bot and the Feather RF. When the temperature is over 65 F, the Bot will transmit the temperature to Bunny Bot RX. If it is not over 65F, the Bot will send a message that says “Cold enough for pashmy!”.
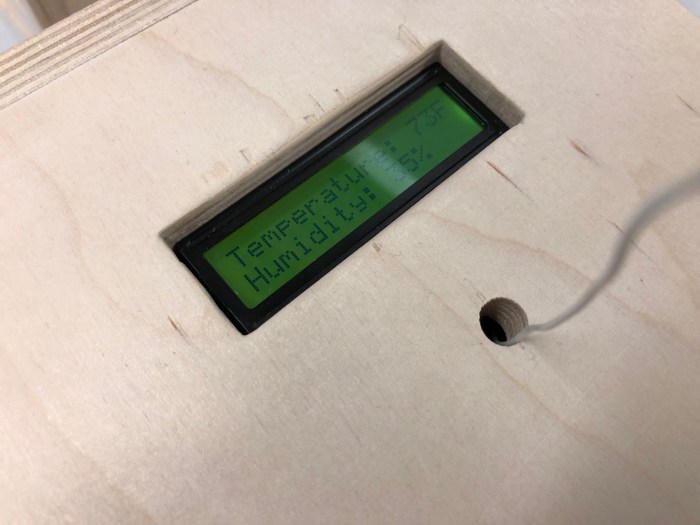
Bunny Bot RX (right) receives the signal also using the Feather RF. It then displays the temperature and humidity on the LCD display. When the temperature is over 75F, the fan located in the mouth of Bot RX will turn on. The fan is connected to a transistor which acts a switch to turn it on or off. The LCD display and the fan are powered by the 12V DC adapter. The Feather RF is powered by a 3.7V, 2000 mAH li-poly battery.


Interaction:
—
Final Code for Feather RX: https://github.com/emilylin-itp/energy/blob/master/cool_bunny/032419_Feather9x_RX_temp_boardB/032419_Feather9x_RX_temp_boardB.ino
Final Code for Feather TX: https://github.com/emilylin-itp/energy/blob/master/cool_bunny/032419_Feather9x_TX_temp_boardA/032419_Feather9x_TX_temp_boardA.ino
—
Strategy to finish:


—
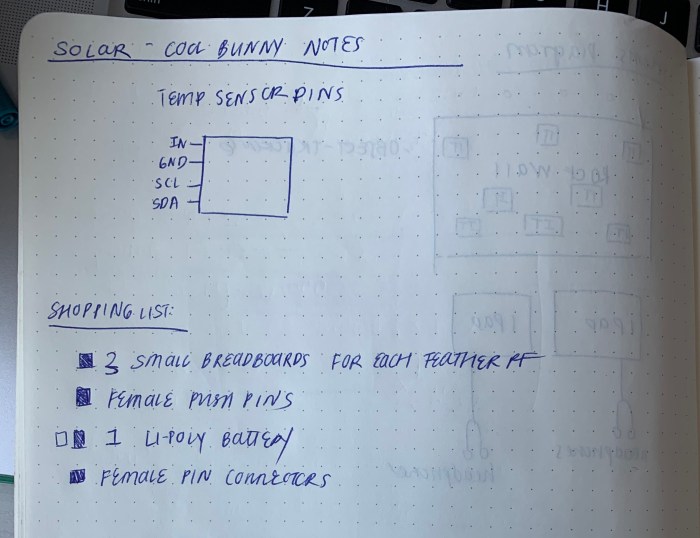
a.) Combine circuit of Feather (TX) with Temperature Board A (this is the board that will transmit data and read temperature + humidity. solar panel hooked up to this feather)

—
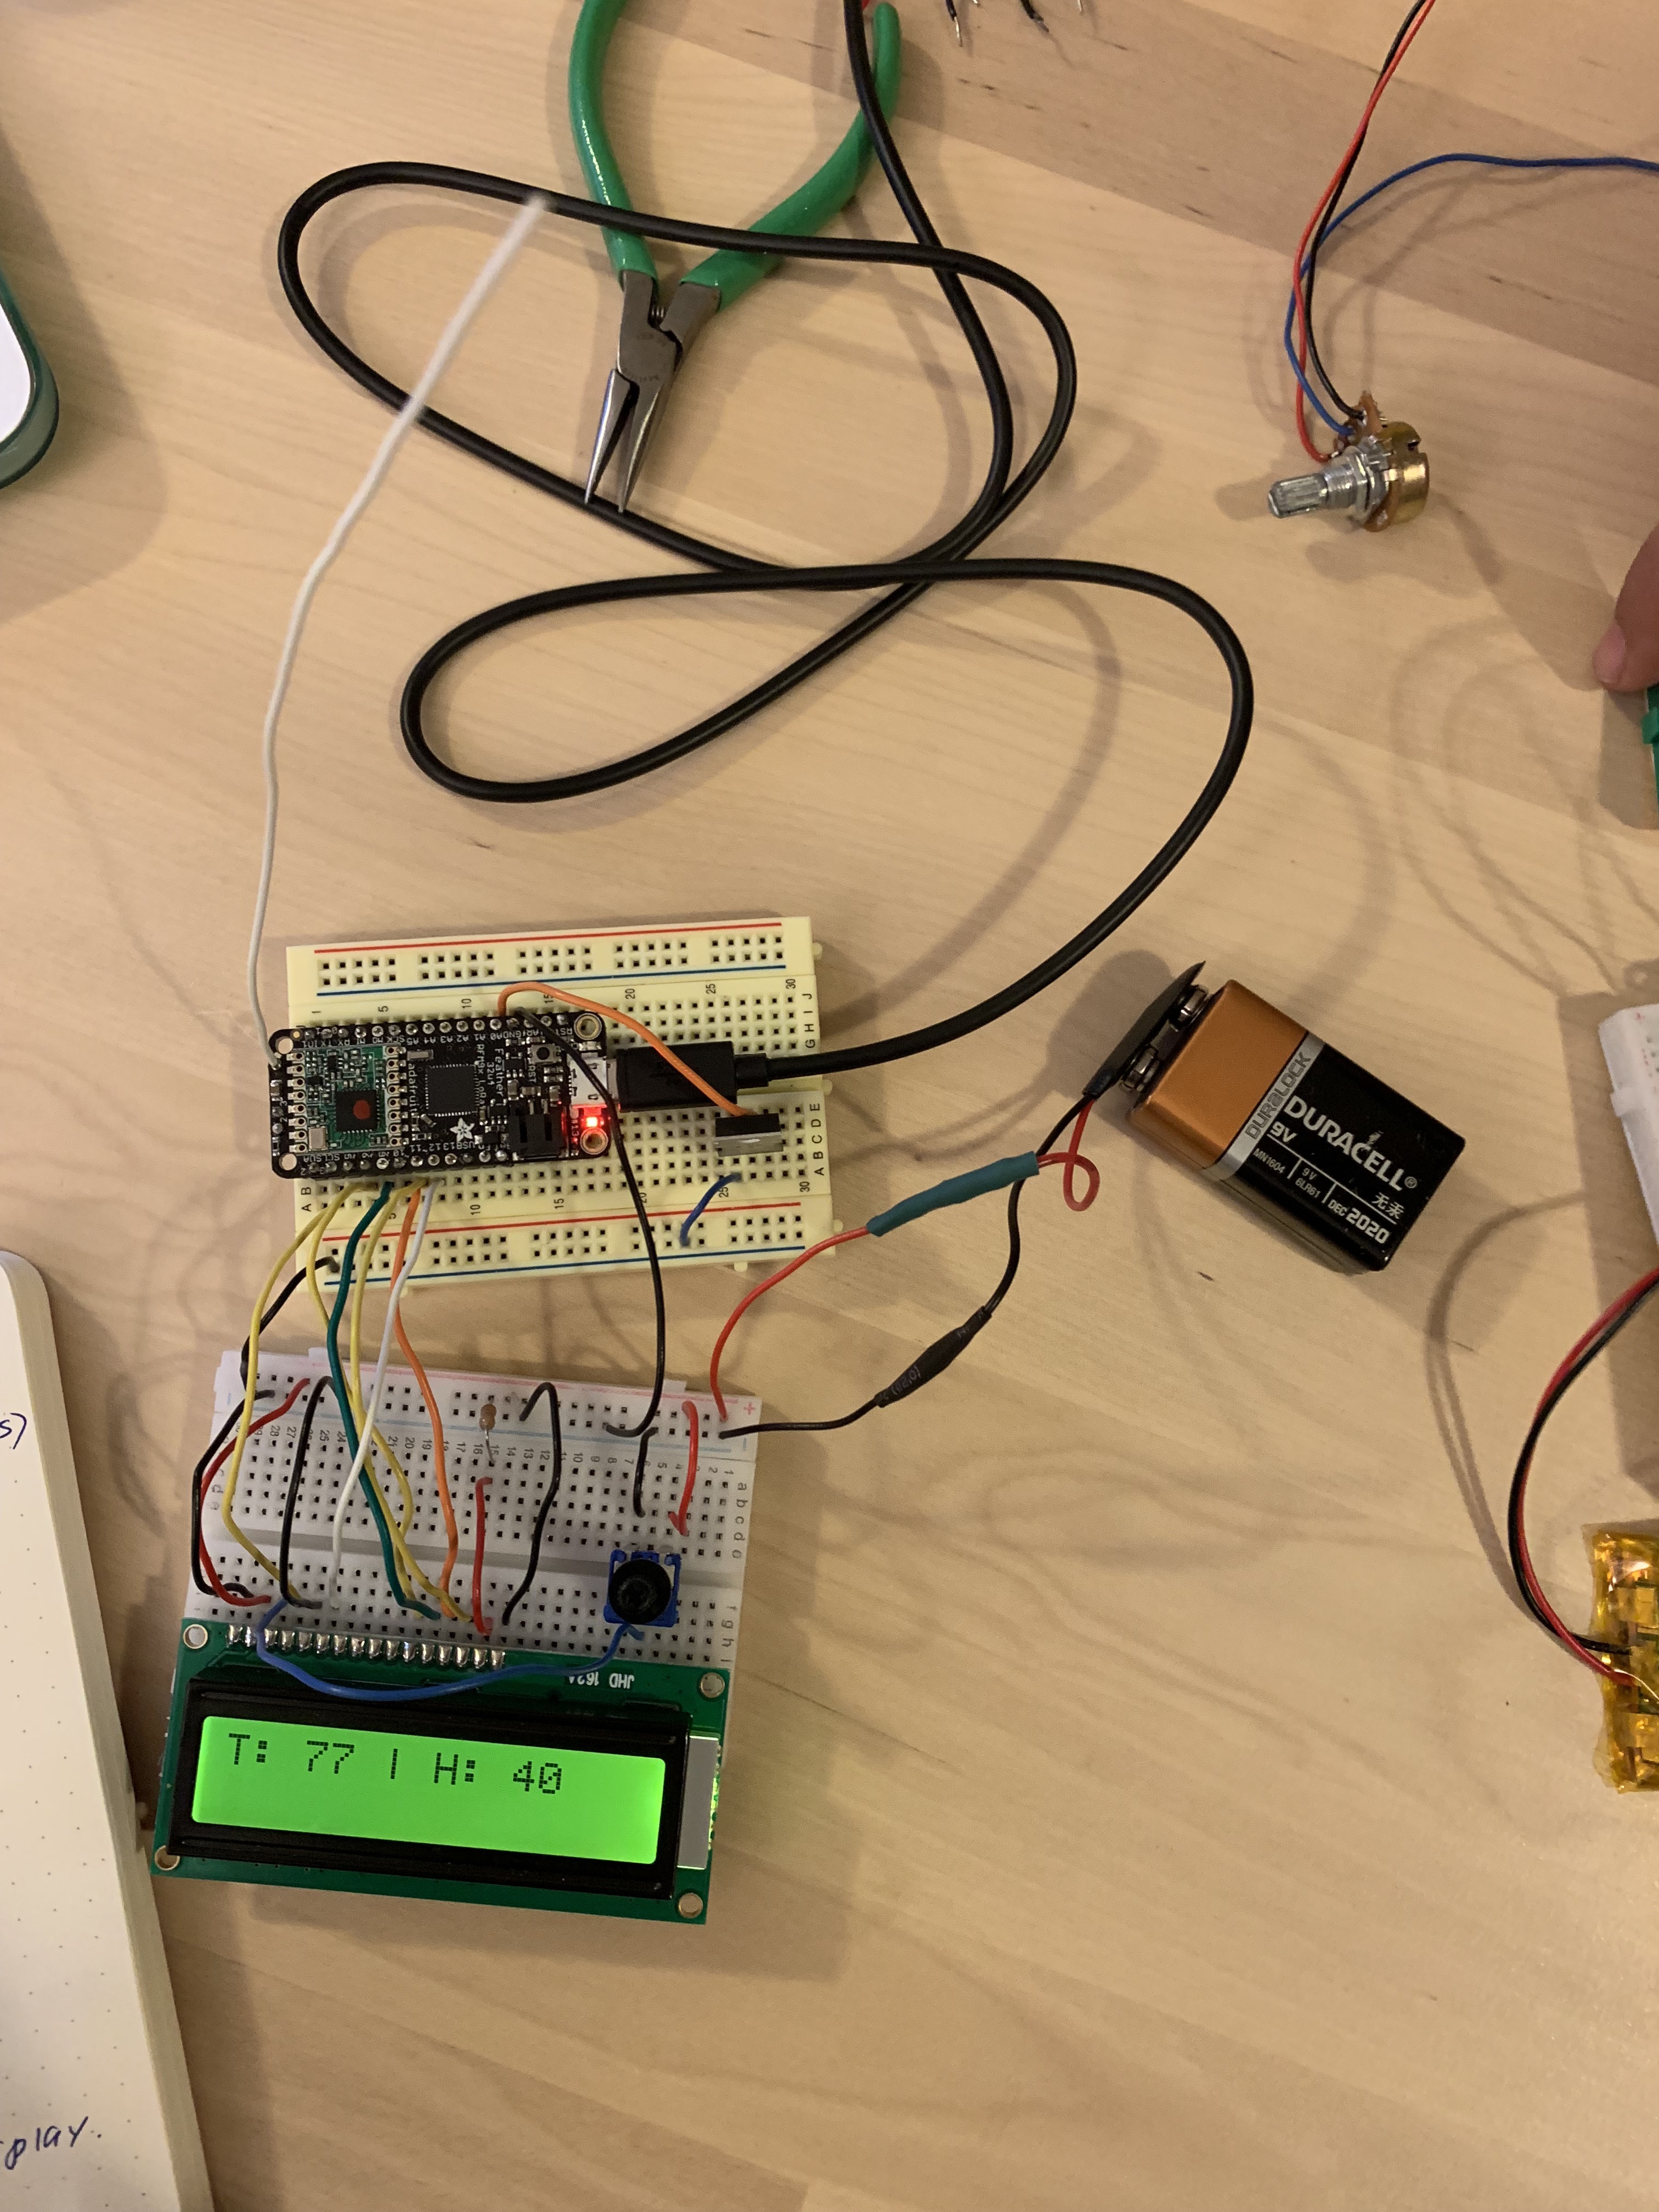
b.) Combine circuit of Feather (RX) with Temperature Board B (this is the board that receives data and displays the data on LCD. If temperature high enough it will turn on the fan)
Here is the Feather TX and Feather RX boards together (both with their adorable little antennas!)
—
c.) Turn on fan with new Temperature Board B
—
d.) Put fan and LCD board on 12V adapter
Notes on measuring the right resistor to put when using the 12V adapter to power the fan and the power the LCD display.

—-
e.) Attach solar panel to Feather TX board

—
f.) Deep Sleep Libraries
For resetting the Feather when port stops showing up:
Ran into issues with my feather RF not reading the port when I tried to run the sleepyDog library. Found this Q&A on Adafruit (https://learn.adafruit.com/adafruit-feather-32u4-radio-with-rfm69hcw-module/faq) extremely helpful for resetting the feather.
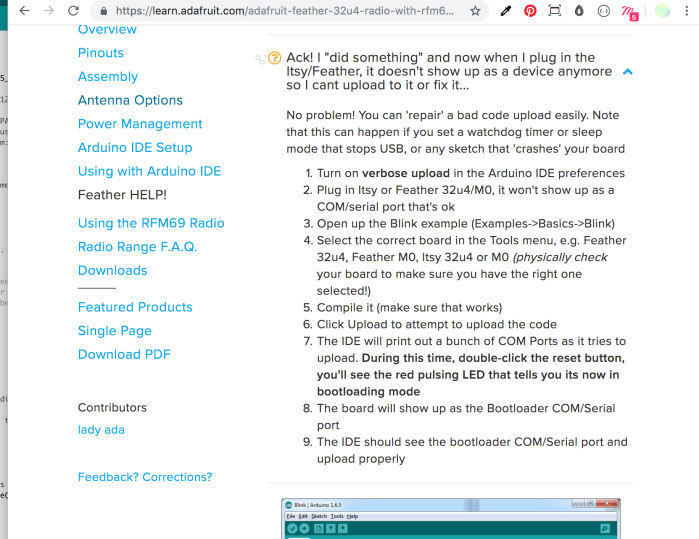
However, for the class demo I will not be using the version with the SleepyDog library, because every time I run it, my usb port gets disconnected and I can’t communicate with my feather RF anymore.
Once the bunny bots are back in my apartment, I will uncomment the SleepyDog code out and run it and just let the feathers do their thing.
—
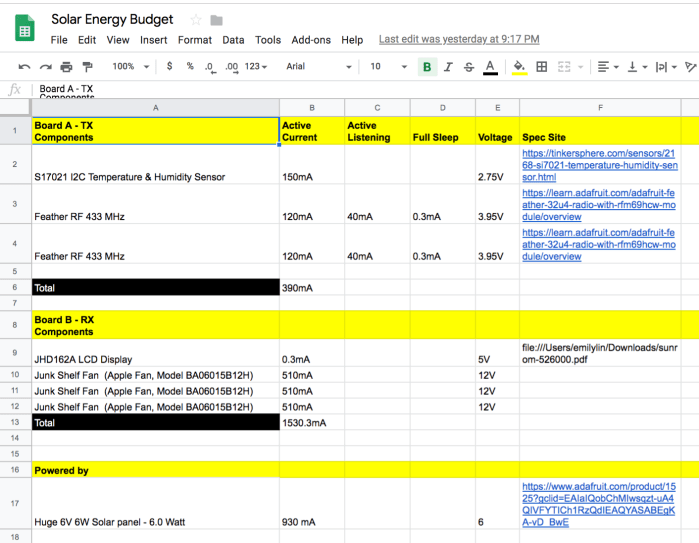
g.) Edited energy budget:
h.) Fabricate the bunny bots!
Sketches of dimensions.
Using the CNC to cut the bots.

2 bots done being routed! Now time to glue!

Bots are made with the components ready to be placed inside!

—
i.) Components placed in Bots

Helpful resources for understanding how to use Feather RF/ Code in Arduino:
- https://learn.adafruit.com/adafruit-feather-32u4-radio-with-rfm69hcw-module/using-the-rfm69-radio
- http://forum.arduino.cc/index.php?topic=45187.0
- https://www.arduino.cc/reference/en/language/variables/data-types/string/
- https://forum.arduino.cc/index.php?topic=96299.0
- https://stackoverflow.com/questions/5242524/converting-int-to-string-in-c
- https://www.arduino.cc/en/Tutorial.StringToIntExample
- https://www.arduino.cc/reference/en/language/variables/data-types/string/functions/substring/
Helpful resource for putting the Feather 32uF to sleep:
