For this week’s enclosure project I decided to merge it with the build for my pcomp final. There are 3 enclosures for the pcomp project – one for the lamp, one for the house and one for the entire interactive display. Ideally, I was hoping to finish all 3 enclosures/ the entire build by Friday but hiccups with the production delayed this goal. On the bright side, the hinge lamp arm was completed and the lights are enclosed.
1.) I found some great inspiration from Darbin’s “Building an Articulating LED task Lamp.” I followed along with her great process but made some tweaks here and there.
2.) First I cut the circle shape for the lamp using a circle jig and hand router (see pcomp blog for details on that).
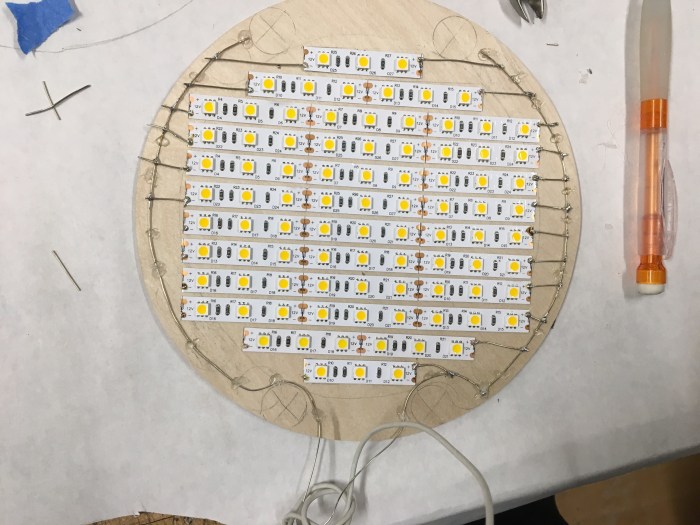
3.) Next, I mapped out where I wanted my LED light strips to go. After talking with Professor Tom, I got non addressable LED lights. I wanted to make sure that the lights were extremely bright which is why I purchased the 12V LED strips. The idea is that the lamp is supposed to symbolize the sun, therefore I wanted it to be insanely bright; this would also help the solar panels on the house be able get a better sensor reading.


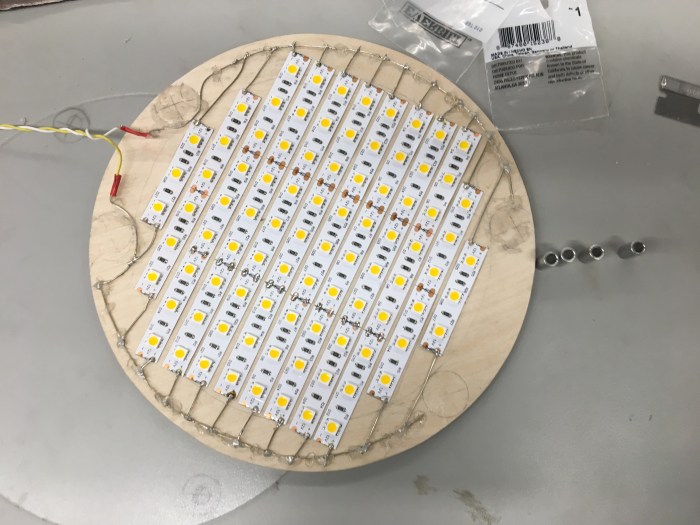
4.) After mapping, I started to cut, place and solder the LED strips onto the wood circle.
5.) I then placed the magnets onto the wood and tested out how the lights looked with the frosted acrylic circle on top. Based on Darbin’s youtube tutorial, she had magnets as her way of enclosing. She placed lock washers on top of the acrylic to hold it in place. This is why I tried the magnet idea.


6.) I also tested the LED strips by using a dc adapter. This was helpful because I realized one of the strips was not making contact with the wire. I immediately fixed that.


7.) Truth be told, I was disappointed with how the magnets looked. It looked clunky. I received some great advice from fellow ITP first year, Matt, to use standoffs and thin paper on the acrylic for a more diffuse look. I found this to be very helpful advice and got to work on editing the lamp. I had to take of the magnets, do a little rewiring/ hot glue guning.
8.) Researched a little about what type of enclosure I wanted. At home depot, I decided to get 1/2″ long standoffs to give it distance (for a diffuse look).


9.) Next was marking and drilling holes into the acrylic top.


10.) I used the holes in the acrylic as a stencil for where to drill into the wooden base of the lamp. This included using multiple clamps to help drill into multiple layers.


11.) Then the enclosure was complete! There are certain things I’m not happy with, such as the fact that people can see the ugly glue gun application I did ( if I knew it’d show through so much I would’ve tried to keep the circuit looking pristine!). Another silly mistake I made was soldering the led strips to another thinner piece of wood. I did this because I was hoping that in case anything goes wrong I could easily screw/ unscrew the circle with the lights to the circle without the lights. Unfortunately this creates unevenness when screwing.
I’m thinking of attaching a yellow sheet of flexible acrylic around the edges to hide the circuit and the uneven edges between the 2 circles. Will get clarity on that.
The hinge base for the light arm is a whole other story that lives on a pcomp blog post. Same goes for the entire build. However, the enclosure for this lamp well deservedly went through enough steps to write a whole blog post for! Below are some images of the lamp in the actual setup!


